
Monitoring production is an important part of a software provider. Many companies providing monitoring systems to maintain the production environment. Spring boot comes with different awesome modules that developers can easily configure and maintain development and production environment also. The actuator module provides production-ready features by which we can easily maintain production environment. The actuator exposes JMX and HTTP endpoints.
Features
Endpoints: Spring boot actuator provides some default endpoints by which we can access application information. We can also monitor the production environment with those endpoints. Endpoints can also access by third-party monitoring tools.
Metrics: We can access OS and JVM related information using spring boot actuator endpoints. This is very useful for runtime environment. Spring boot actuator this feature provides by integrating with micrometer application monitoring.
Audit: Spring boot actuator publishes events to AuditEventRepository. AuditEventRepository. Spring security by default publish “authentication success”, “failure” and “access denied” exceptions. This is very useful feature for reporting and authentication failures. Auditing can be enabled by AuditEventRepository. By default, spring-boot provides InMemoryAuditEventRepository for auditing which has limited capabilities.
HTTP Tracing: Spring boot actuator also provides an HTTP tracing facility. If you want to use it you have to include web endpoint. Http tracing provides the information about request-response exchange.
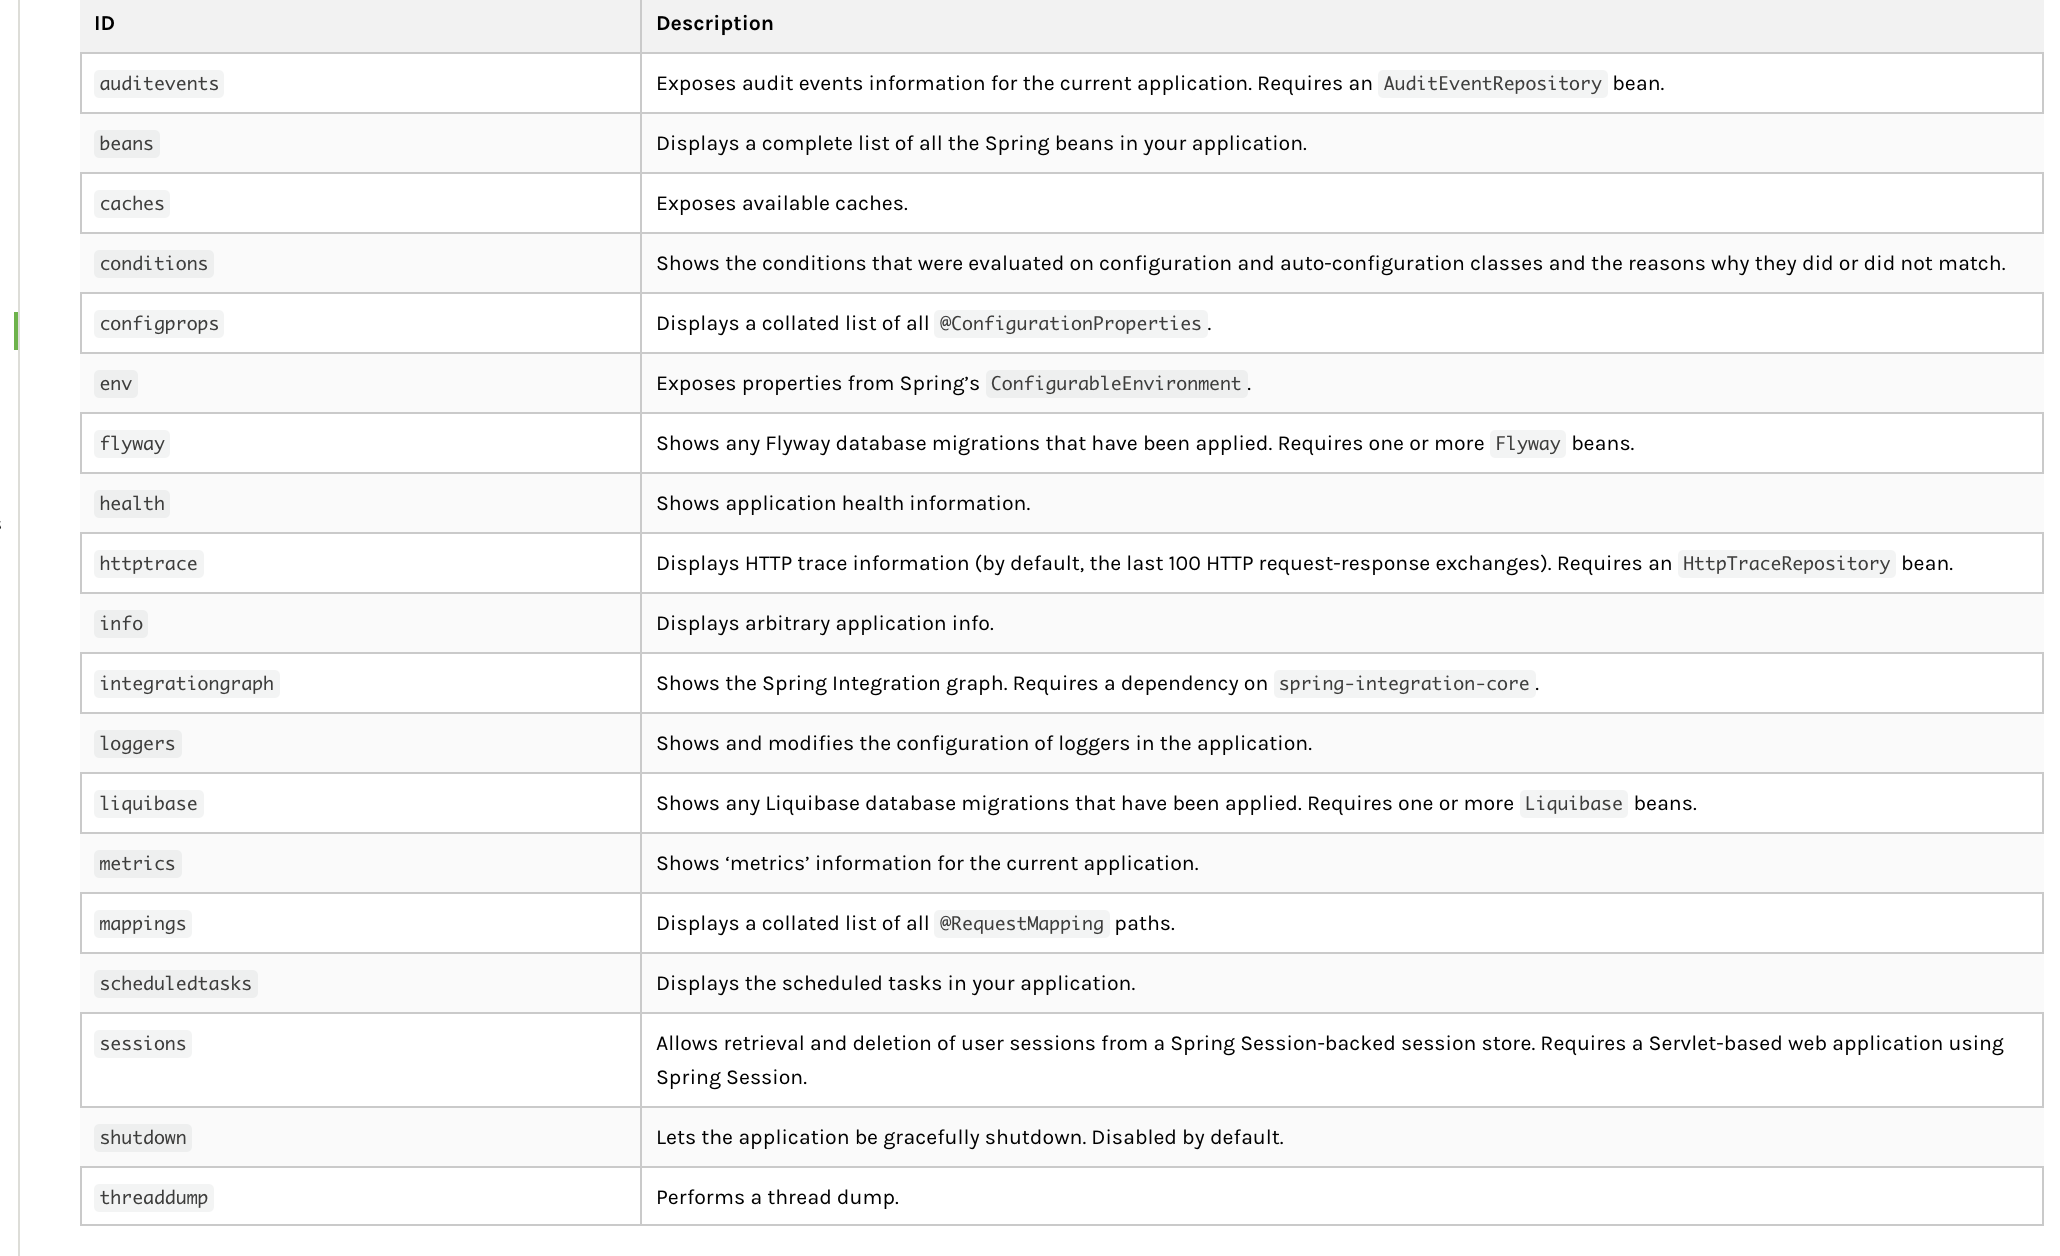
Important Endpoints
Spring boot actuator provides below listed HTTP and JMX endpoint. We will discuss in detail later part of this article.
Building Project
As we know that spring boot provides some starter dependency for different spring modules we can create applications from Spring Initializr with web and actuator modules. You can follow the image instruction. We will use Gradle as build tool.
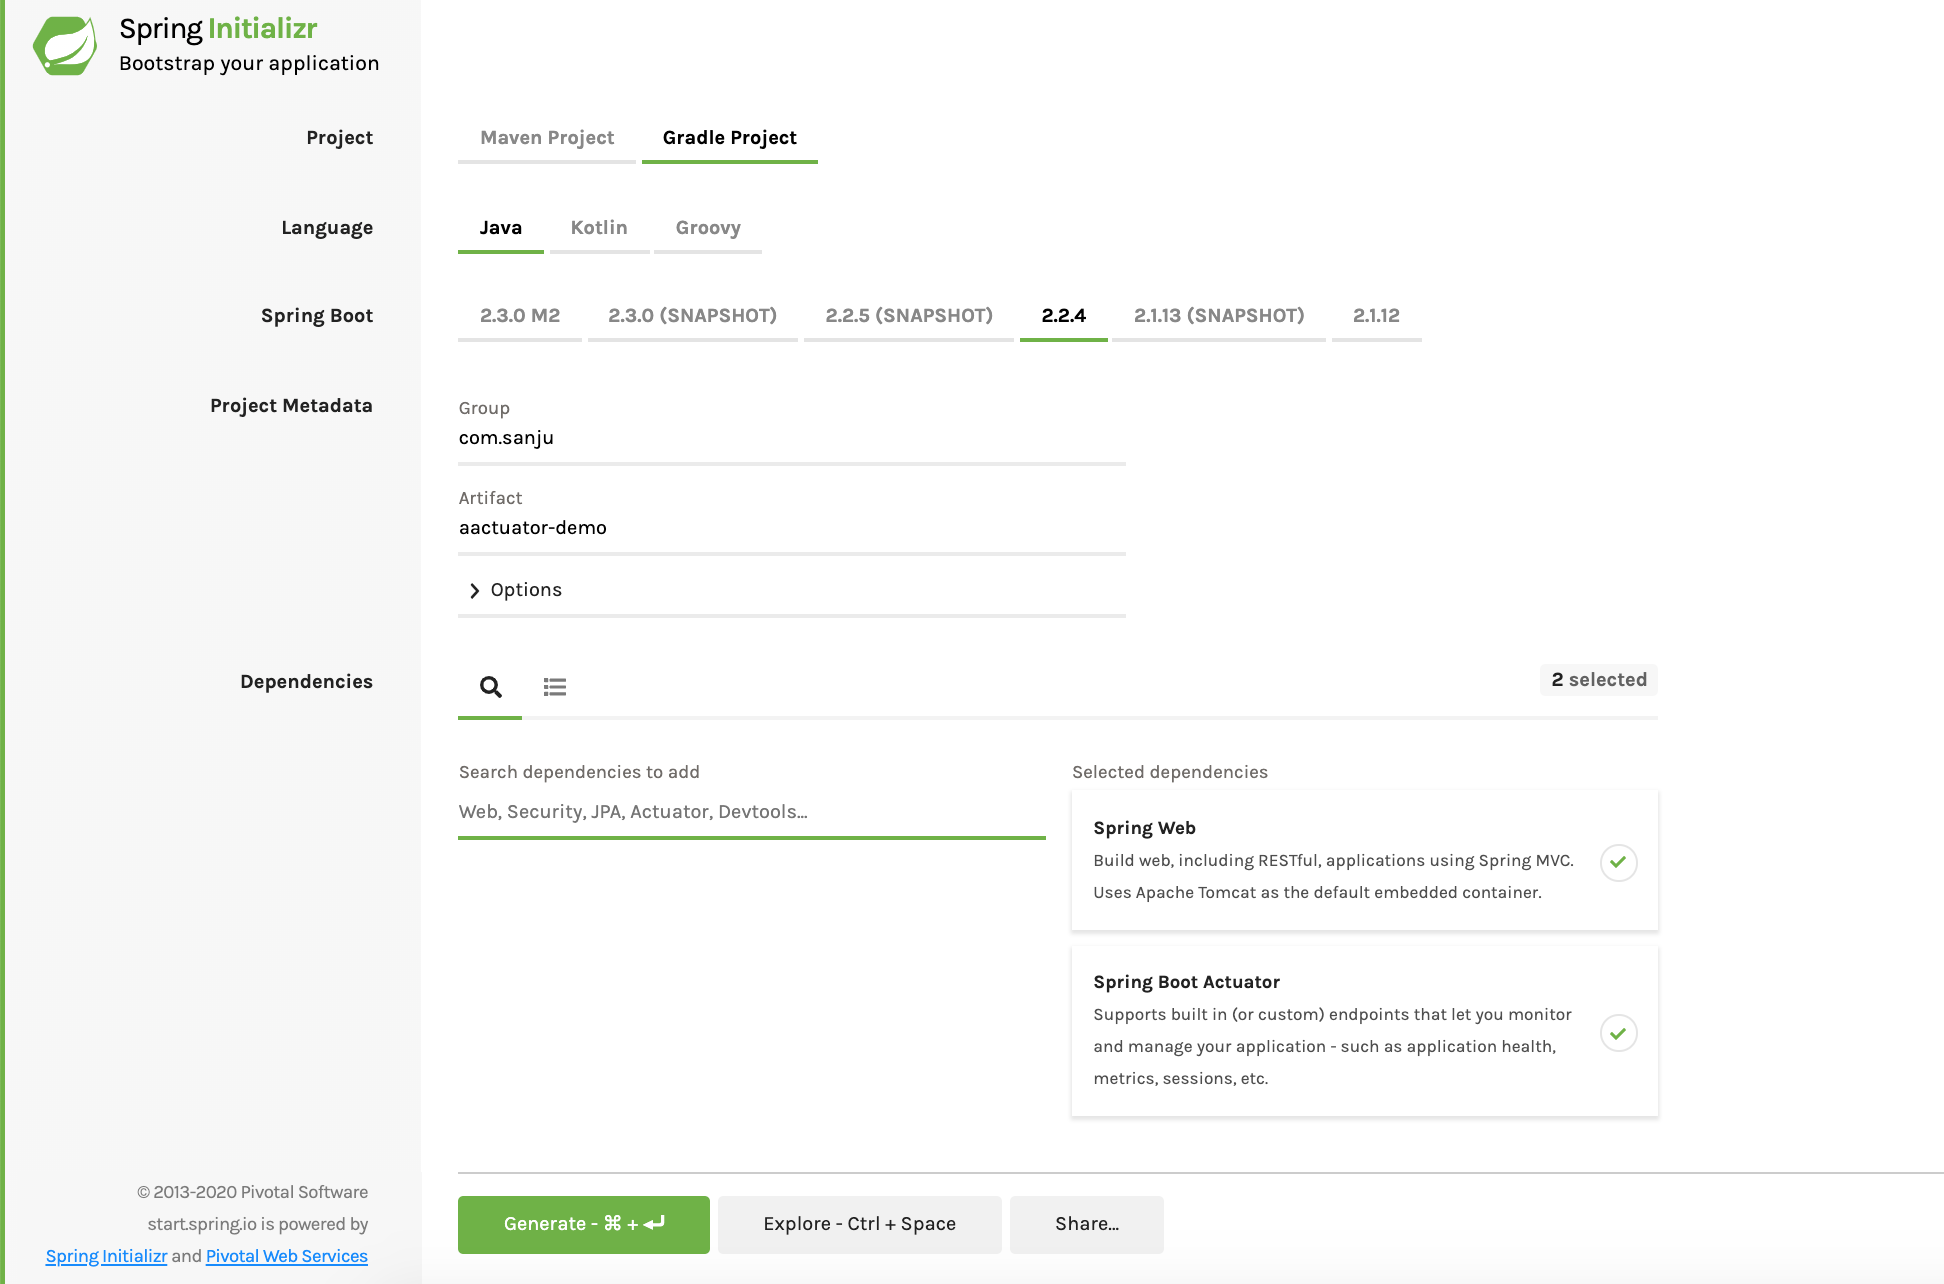
Click on the Generate button to generate the initial project. After that copy this project in a location on your PC and unzip it. Go to the project's root location and open terminal. Your initial build file looks like below code
1 2 3 4 5 6 7 8 9 10 11 12 13 14 15 16 17 18 19 20 21 22 23 24 25 | plugins { id 'org.springframework.boot' version '2.2.4.RELEASE' id 'io.spring.dependency-management' version '1.0.9.RELEASE' id 'java' } group = 'com.sanju' version = '0.0.1-SNAPSHOT' sourceCompatibility = '1.8' repositories { mavenCentral() } dependencies { implementation 'org.springframework.boot:spring-boot-starter-actuator' implementation 'org.springframework.boot:spring-boot-starter-web' testImplementation('org.springframework.boot:spring-boot-starter-test') { exclude group: 'org.junit.vintage', module: 'junit-vintage-engine' } } test { useJUnitPlatform() } |
So now we will deploy the project. Run gradle bootrun from terminal. With default configuration, application will run at 8080 port with management path /actuator. After deployment completion we will browse the url http://localhost:8080/actuator/ from a browser. With default configuration, actuator module expose four endpoints that we can see as the response.
Spring boot actuator module provides the facility to change the management port and path by adding some property in application.properties file. So, we will add the following lines of code to the application.properties file.
// 20200222142835
// http://localhost:8080/actuator/

{
  "_links": {
    "self": {
      "href": "http://localhost:8080/actuator",
      "templated": false
    },
    "health-path": {
      "href": "http://localhost:8080/actuator/health/{*path}",
      "templated": true
    },
    "health": {
      "href": "http://localhost:8080/actuator/health",
      "templated": false
    },
    "info": {
      "href": "http://localhost:8080/actuator/info",
      "templated": false
    }
  }
}
Spring boot actuator module provides the facility to change the management port and path by adding some property in application.properties file. So, we will add the following lines of code to the application.properties file.
1 2 | management.endpoints.web.base-path=/custom-path management.server.port=8070 |
After deployment with this changes, we will get same output with http://localhost:8070/custom-path/ URL.
Expose Endpoints
With default configuration we can access only four endpoints but spring actuator has more endpoints like metrics, httptrace, auditevents etc. If we want to access such endpoints we need to configure them. Spring boot actuator provides some configuration to include and exclude endpoints from user. Here is an example of application.properties file.
After deployment with this properties file we will check different endpoints. We can see that, without health and metrics endpoint maximum endpoints will work. To make all endpoints make workable we need to add more configuration related to specific endpoints. If we hit http://localhost:8070/custom-path/ , we can see that the endpoints exposed by actuator.
management.endpoints.web.base-path=/custom-path management.server.port=8070 management.endpoints.jmx.exposure.include=* management.endpoints.jmx.exposure.exclude=health, metrics management.endpoints.web.exposure.include=* management.endpoints.web.exposure.exclude=health, metrics
After deployment with this properties file we will check different endpoints. We can see that, without health and metrics endpoint maximum endpoints will work. To make all endpoints make workable we need to add more configuration related to specific endpoints. If we hit http://localhost:8070/custom-path/ , we can see that the endpoints exposed by actuator.
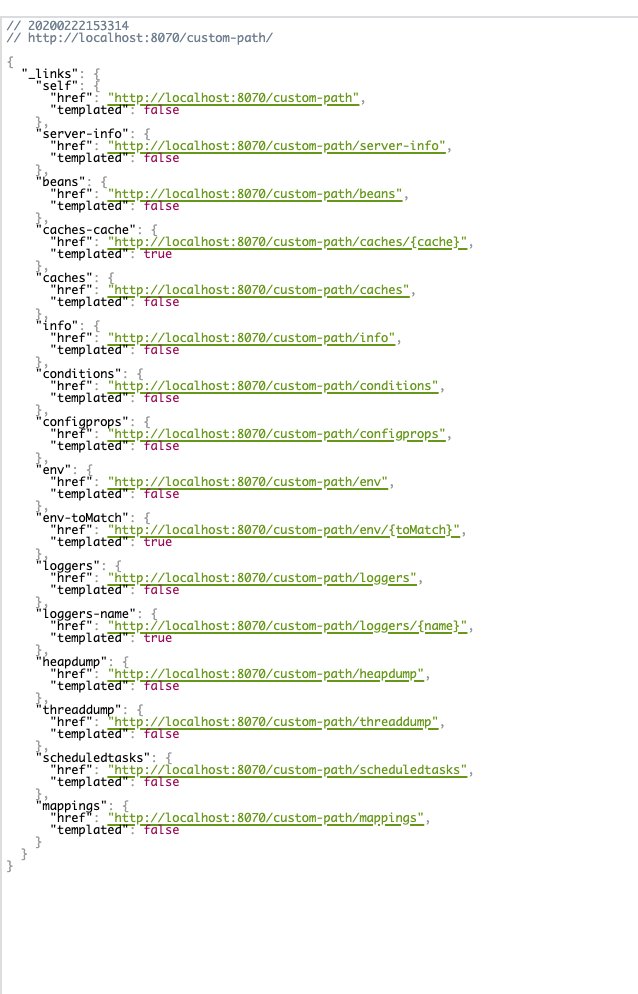
Here we can see that health and metrics endpoint are missing, because we excluded then from our configuration.
Add custom endpoints
Spring boot actuator provides the facility to write custom endpoints from where we can see our own customised application data. For example, I am using custom endpoint to check my server address , server deployed in which OS, MAC address of server and which java version installed in server machine.
1 2 3 4 5 6 7 8 9 10 11 12 13 14 15 16 17 18 19 20 21 22 23 24 25 26 27 28 29 30 31 32 33 34 35 36 37 38 39 40 41 42 43 44 45 46 47 48 | package com.sanju.actuatordemo.core; import org.springframework.boot.actuate.endpoint.annotation.Endpoint; import org.springframework.boot.actuate.endpoint.annotation.ReadOperation; import org.springframework.stereotype.Component; import java.net.InetAddress; import java.net.NetworkInterface; import java.time.LocalDate; import java.time.LocalTime; import java.util.ArrayList; import java.util.List; @Component @Endpoint(id = "server-info") public class ServerInfoActuatorEndpoint { @ReadOperation public List<String> getServerInfo() { List<String> serverInfo = new ArrayList<String>(); try { serverInfo.add("Server IP Address : " + InetAddress.getLocalHost().getHostAddress()); serverInfo.add("Host Name: " + InetAddress.getLocalHost().getHostName()); serverInfo.add("Server OS : " + System.getProperty("os.name").toLowerCase()); NetworkInterface network = NetworkInterface.getByInetAddress(InetAddress.getLocalHost()); byte[] mac = network.getHardwareAddress(); StringBuilder sb = new StringBuilder(); for (int i = 0; i < mac.length; i++) { sb.append(String.format("%02X%s", mac[i], (i < mac.length - 1) ? "-" : "")); } serverInfo.add("Hardware Address : "+ sb.toString()); serverInfo.add("Java Version : "+getJavaVersion()); } catch (Exception e) { e.printStackTrace(); } return serverInfo; } private int getJavaVersion() { String version = System.getProperty("java.version"); if(version.startsWith("1.")) { version = version.substring(2, 3); } else { int dot = version.indexOf("."); if(dot != -1) { version = version.substring(0, dot); } } return Integer.parseInt(version); } } |
Spring boot actuator provides some annotation by which we just configured our system. @Endpoint annotation enabled it as an endpoint and annotations @WriteOperation, @ReadOperation, @DeleteOperation to perform like POST,GET,DELETE operations in HTTP verbs. Here w just used @ReadOperation annotation. So if we now redeploy the application and hit with url http://localhost:8070/custom-path/server-info,we will get following output.
1 2 3 4 5 6 7 8 9 10 | // 20200222160924 // http://localhost:8070/custom-path/server-info [ "Server IP Address : 192.168.0.177", "Host Name: Lovely-MacBook-Pro.local", "Server OS : mac os x", "Hardware Address : A4-5E-60-F2-07-51", "Java Version : 8" ] |
Spring security with actuator
Spring boot actuator exposes some endpoints which are really sensitive. Those endpoint contains many system and core application related information like beans, metrics and configuration related information. So we have to make access restricted for endpoints. For this purpose we can use spring security. Spring boot actuator provides auto configuration of spring security. To make endpoints secured we have to add following dependency to build.properties file.
1 | compile 'org.springframework.boot:spring-boot-starter-security'
|
To define username and password we need to add following lines to application.properties file.
1 2 | spring.security.user.name=admin spring.security.user.password=admin |
Spring boot actuator security auto configuration is done. We need to restart the server again to enable spring security. After redeploy the application, we have to hit http://localhost:8070/custom-path/server-info. URL will be redirect to http://localhost:8070/login..
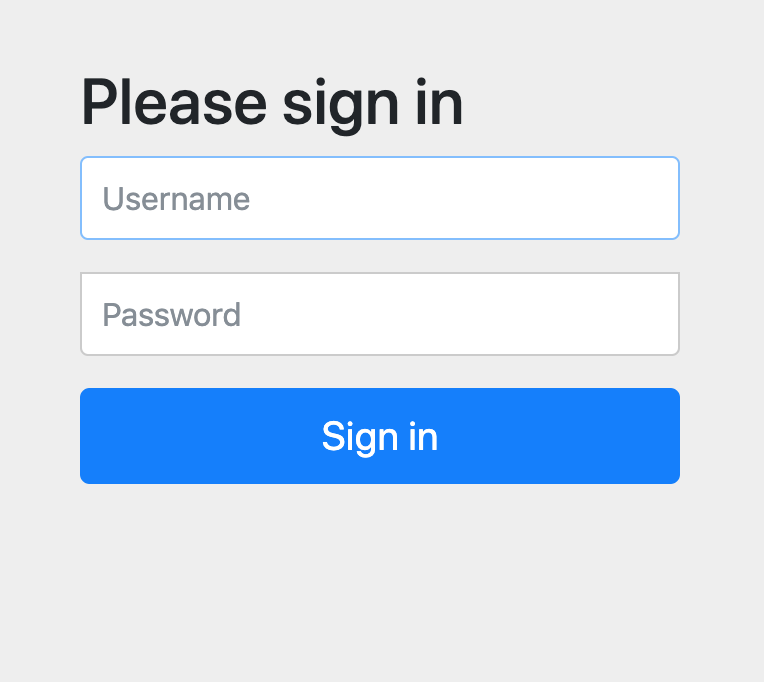
As we have configured admin as username and password, we need to enter username and password and click on Sign in button. If we provide wrong username or password it will give the Bad credentials error. Otherwise, redirect to our desire page. By default /info and /health endpoints are non restricted. We can access those without credentials.
Since Spring boot 2 we can configure endpoint security config with spring security by extending WebSecurityConfigurerAdapter class. I have created a class SecurityConfig which extends WebSecurityConfigurerAdapter and override configure and userDetailsService method. I have also included bcrypt encoder as password encoder.
1 2 3 4 5 6 7 8 9 10 11 12 13 14 15 16 17 18 19 20 21 22 23 24 25 26 27 28 29 30 31 32 33 34 35 36 37 38 39 40 41 | package com.sanju.actuatordemo.core; import org.springframework.boot.actuate.autoconfigure.security.servlet.EndpointRequest; import org.springframework.context.annotation.Bean; import org.springframework.context.annotation.Configuration; import org.springframework.security.config.annotation.web.builders.HttpSecurity; import org.springframework.security.config.annotation.web.configuration.WebSecurityConfigurerAdapter; import org.springframework.security.core.userdetails.User; import org.springframework.security.core.userdetails.UserDetails; import org.springframework.security.core.userdetails.UserDetailsService; import org.springframework.security.crypto.bcrypt.BCryptPasswordEncoder; import org.springframework.security.crypto.password.PasswordEncoder; import org.springframework.security.provisioning.InMemoryUserDetailsManager; @Configuration public class SecurityConfig extends WebSecurityConfigurerAdapter { @Override protected void configure(HttpSecurity http) throws Exception { http.requestMatcher(EndpointRequest.toAnyEndpoint()).authorizeRequests() .antMatchers("/custom-path/**").hasRole("ADMIN") .and() .httpBasic(); } @Bean @Override public UserDetailsService userDetailsService() { UserDetails user = User.withUsername("admin") .password(passwordEncoder().encode("admin")) .roles("ADMIN") .build(); return new InMemoryUserDetailsManager(user); } @Bean public PasswordEncoder passwordEncoder() { return new BCryptPasswordEncoder(); } } |
With this configuration we can restrict specific endpoints as we want. So now we hit url http://localhost:8070/custom-path/info from browser it gives a pop-up for credentials.
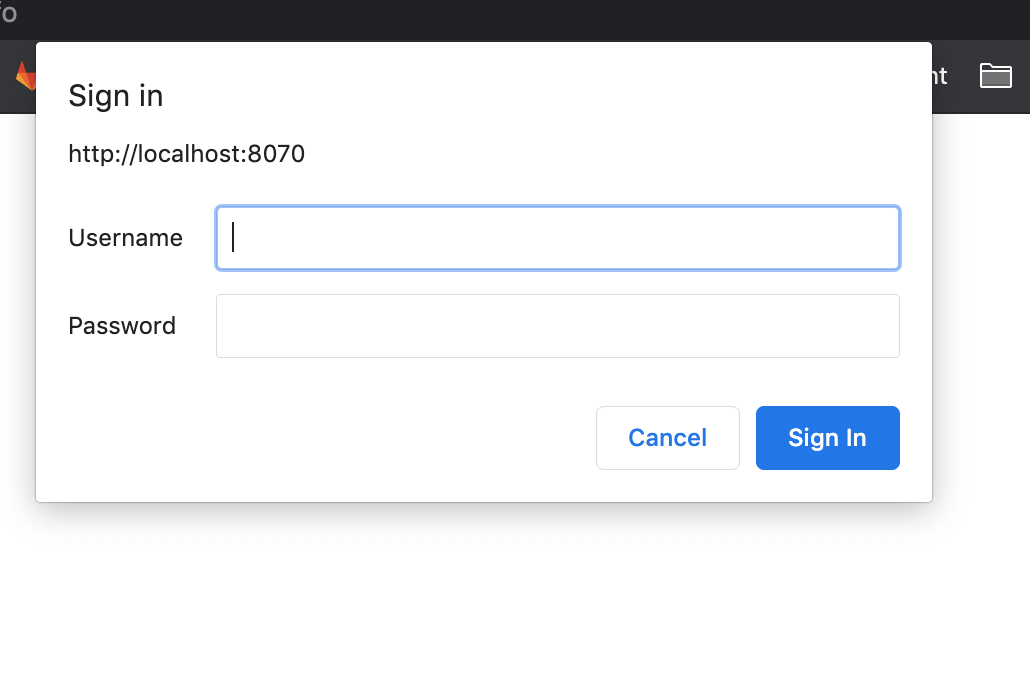
So we have to enter our credentials to access the specific url otherwise we will get 404 Unauthorized response. May we can get further details from spring security.
More about /info endpoint
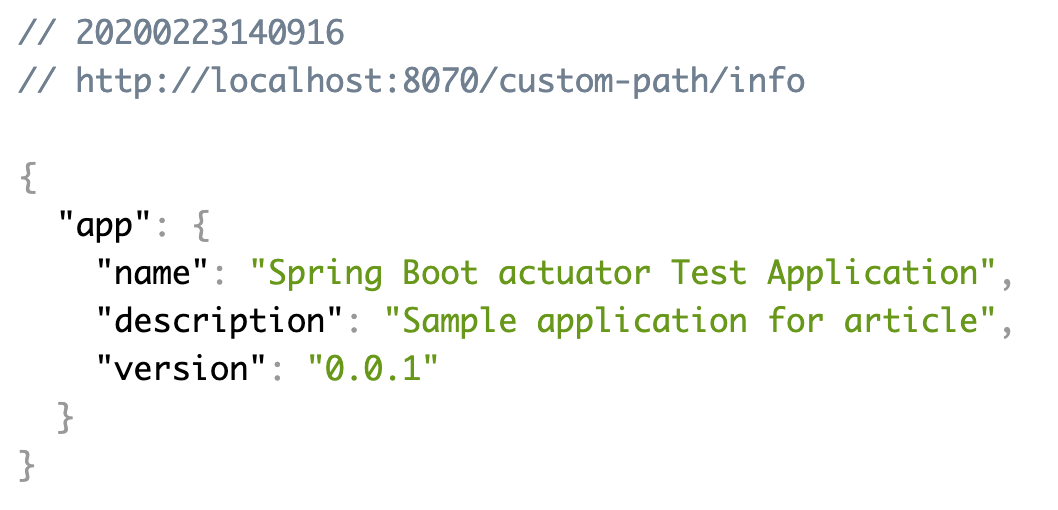
With /info endpoint we want to get basic information about the application. For example we can define static properties about the application by defining them to application.properties file.
1 2 3 | info.app.name=Spring Boot actuator Test Application info.app.description=Sample application for article info.app.version=1.0. |
After this configuration added, we can browse http://localhost:8070/custom-path/info URL. We should get following output
We can add others information like build info, git info of application. So, we have to add following lines of code to build.properties file. For build info we have to add.
1 2 3 | springBoot { buildInfo() } |
And for git information we have to initialise git repository by executing git init command and then add files and commit to git by executing git add -A , git commit -m "Initial commit" respectively. And then add following plugin to build.properties.
1 2 3 4 5 6 7 | plugins { id 'org.springframework.boot' version '2.2.4.RELEASE' id 'io.spring.dependency-management' version '1.0.9.RELEASE' // added plugin to access git information id "com.gorylenko.gradle-git-properties" version "1.5.1" id 'java' } |
We can see the custom information of the application by using InfoContributor interface. We will create CustomInfoContributor.java by implementing InfoIndicator.
1 2 3 4 5 6 7 8 9 10 11 12 13 14 | package com.sanju.actuatordemo.core; import org.springframework.boot.actuate.info.Info; import org.springframework.boot.actuate.info.InfoContributor; import org.springframework.stereotype.Component; @Component public class CustomInfoContributor implements InfoContributor { @Override public void contribute(Info.Builder builder) { builder.withDetail("customInfo","This is custom info indicator. You can add your application data. " + "You can share application persistent data from here"); } } |
So we will hit http://localhost:8070/custom-path/info URL from browser and will get following response.
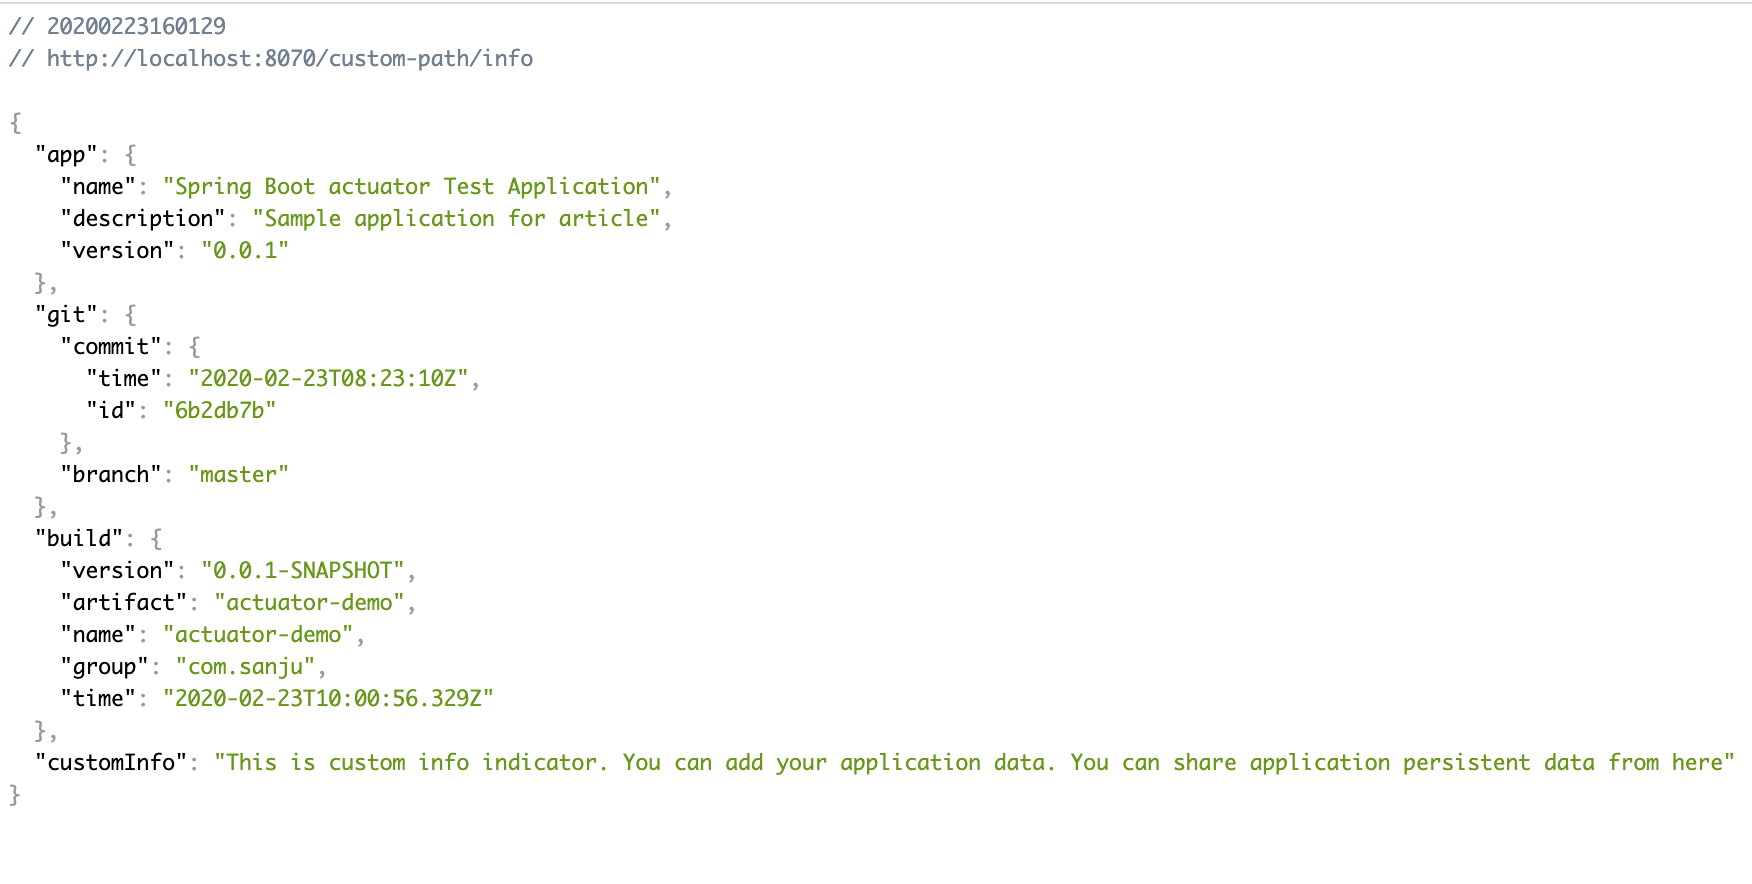
So, here we have got the all information with custom information.
More about /health endpoint
With default configuration health endpoint returns the only information that server is up or down. But we can check details also by adding following line of code to application.properties file. Here value can be when-authorized, always or never against key management.endpoint.health.show-details.
1 | management.endpoint.health.show-details=always |
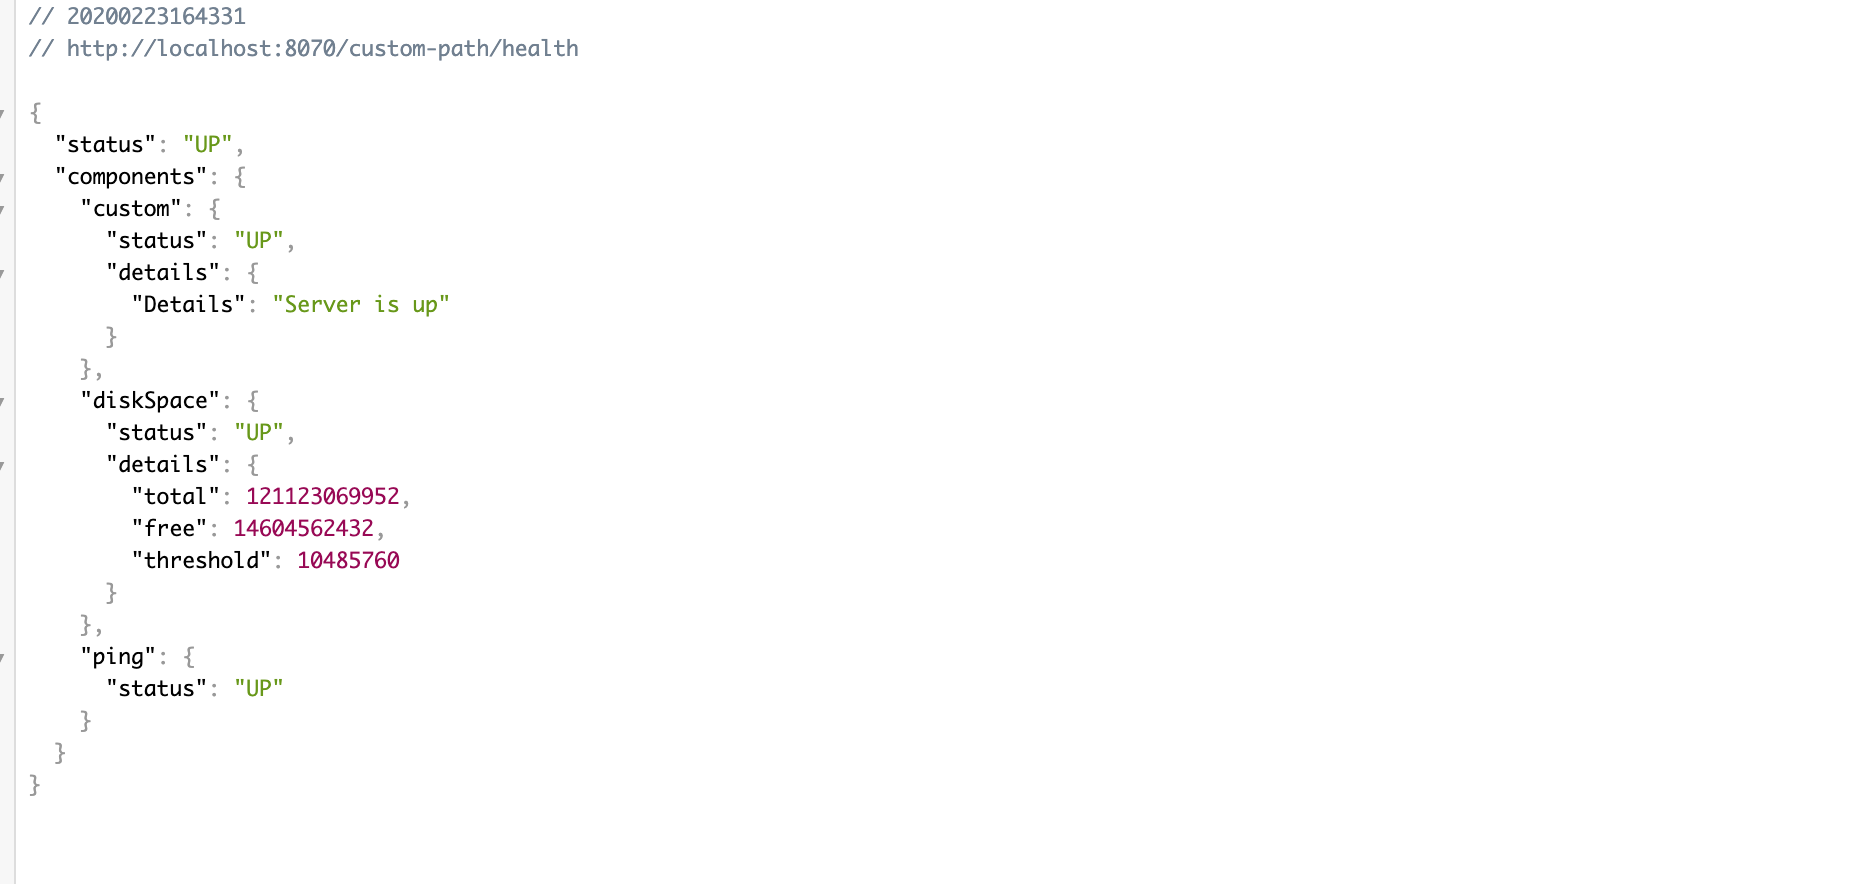
We can also add details of custom health information with details response. Thats why we have to add a custom class which will implements HealthIndicator interface.
1 2 3 4 5 6 7 8 9 10 11 12 13 14 15 | package com.sanju.actuatordemo.core; import org.springframework.beans.factory.annotation.Autowired; import org.springframework.boot.actuate.health.Health; import org.springframework.boot.actuate.health.HealthEndpoint; import org.springframework.boot.actuate.health.HealthIndicator; import org.springframework.stereotype.Component; @Component public class CustomHealthIndicator implements HealthIndicator { @Override public Health health() { Health health = Health.up().withDetail("Details","Server is up").build(); return health; } } |
After re-deploy the server we can browse http://localhost:8070/custom-path/health URL from the browser. We will get below response.
Spring boot actuator contains many useful endpoints rather than I explained in the above. Actuator provides many useful features in production environment. There are lot of things to discuss but this article already goes to too long. I will discuss details of some other endpoints and features in my next article. Thanks.
Happy Coding!!!


0 Comments